MT5 Order Block Indicator
MT5 Order Block Indicator finds bullish and bearish order blocks from a four-bar pattern with a liquidity sweep and a price gap, then tracks each zone through touches, mitigation and expiry. Threshold lines, display filters, real-time alerts and a built-in MFE/MAE Tracker are included.
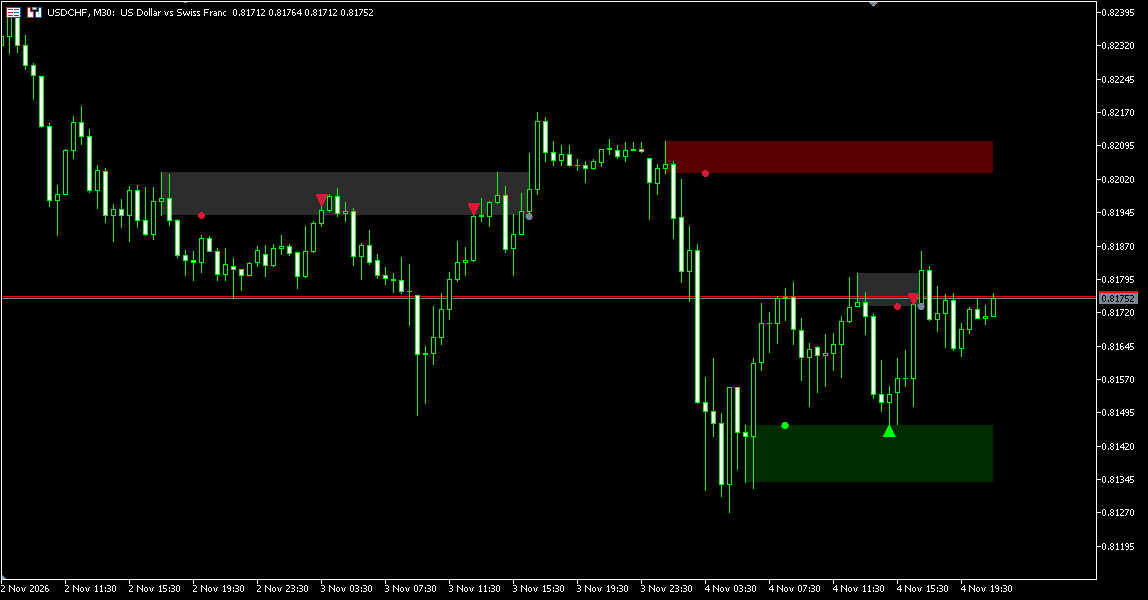
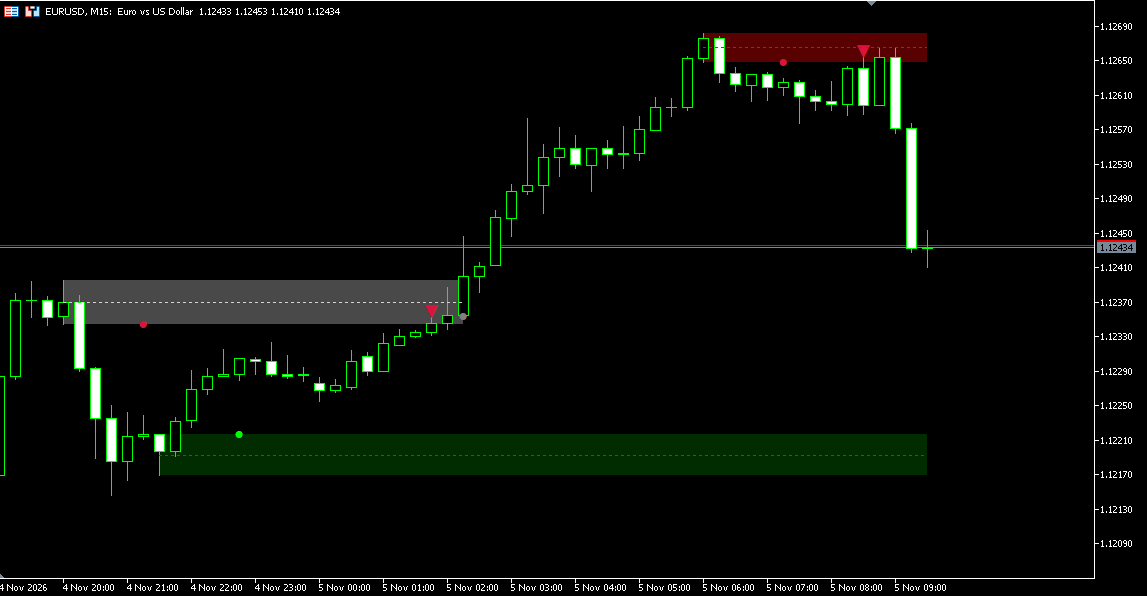
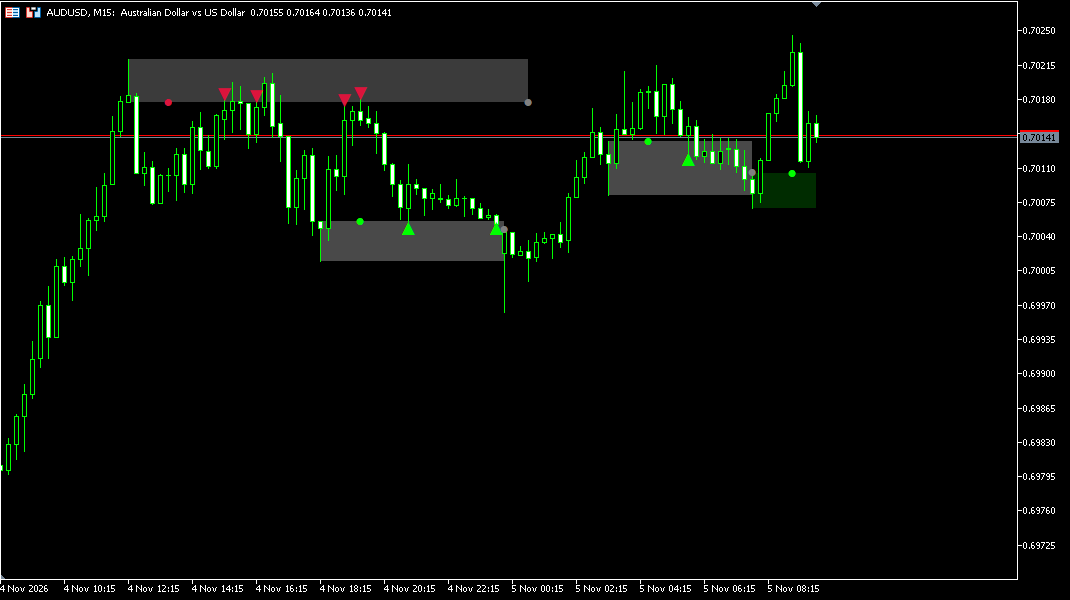
Already a subscriber or have purchased a product?
Order Blocks Explained
An order block is the last opposing candle before a strong move: the last bearish candle before price rises sharply, or the last bullish candle before it falls. Traders who follow smart money concepts mark these candles as zones that price may react to when it returns.
The MT5 Order Block Indicator finds order blocks from a fixed four-bar pattern: an opposing candle that takes out the previous bar’s extreme, a reaction candle in the other direction and a price gap left by the move. Each confirmed order block is drawn as a zone from that candle, green for bullish and red for bearish.
The indicator then follows every zone: it marks the first touch and later touches, turns the zone grey when it is mitigated, and ends it when it expires after a set number of bars or minutes. A threshold line, display filters and colours for each state keep the chart readable.
Alerts for new order blocks, touches and mitigation are sent in real time, and a built-in MFE/MAE Tracker measures how far price moved after order block touches.
Order Block Indicator — Key Features
Order Block Detection
Order blocks found from a four-bar pattern with a liquidity sweep and a gap.
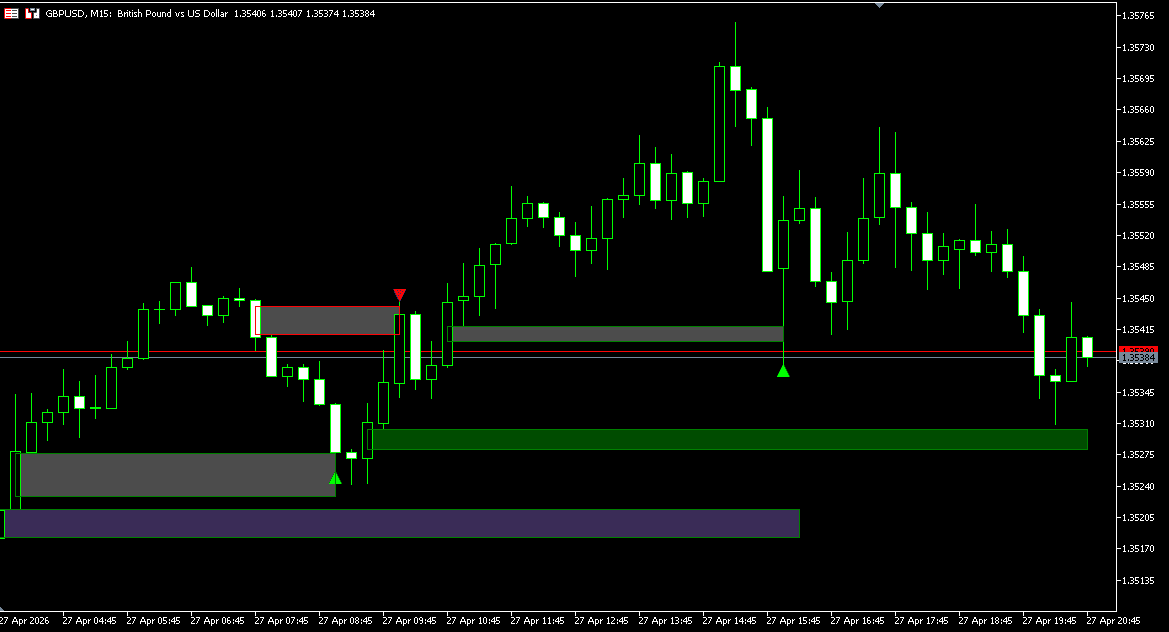
A bullish order block is a bearish candle that takes out the low of the bar before it, followed by a bullish reaction candle and a gap between the order block candle’s high and the low of the bar after the reaction candle. A bearish order block is the mirror image. The bar before the order block candle must not be a doji.
The gap must be at least the minimum size, 5 ticks by default, set in ticks, points or a percentage of price. The order block is confirmed when the pattern’s last bar closes and is drawn from the order block candle.
How an Order Block Is Detected
Order Block Range
Choose which part of the candle forms the zone.
High – Low uses the full candle, Open – Close the body, and Open – High / Low the part from the open to the extreme that was swept: the low for a bullish order block, the high for a bearish one.
High – Low
Open – Close
Open – High / Low
Minimum Length Filter
Short-lived zones are filtered out.
An order block is shown only if price stays out of it for the first 5 bars after the order block candle, set by OB Min Length. Zones that price returns to sooner are discarded and do not appear on the chart.
Touches
Markers when price enters an active zone.
The first time a bar trades into an active order block, a triangle marker appears and an alert can be sent: below the bar for a bullish zone, above it for a bearish one. A later touch is marked only after price has left the zone completely.
Touches and Mitigation
Mitigation
Define when an order block counts as used.
Fully mitigates the zone when price trades through it, Partially at any touch. Either can be judged by the bar’s high and low or by its close. With close-based mitigation, a mitigation on the forming bar is confirmed when the bar closes and removed if the close no longer qualifies. Mitigated zones turn grey and stop extending, and a point marks the mitigation bar.
Mitigated and Expired Order Blocks
Threshold Level
A line inside the zone, 50% by default.
When enabled, a line marks the set percentage of each zone, measured from the edge price reaches first. Mitigation can be tied to that line instead of the zone’s far edge.
Threshold Line
Zone Expiry
Order blocks expire after a set number of bars or minutes.
With Max OB Duration enabled, a zone that is still active after 50 bars, or after a set number of minutes, is marked as expired, drawn in its own colour and marked with a point.
Display Filters and Colours
Show only the zones you need.
Show OB Type displays all order blocks, only active ones, or only mitigated or expired ones. A display limit keeps only the most recent zones on the chart. Colours and opacity are set separately for bullish, bearish, mitigated and expired zones.
Markers and Alerts
Detection, touch, mitigation and expiry on the chart, with alerts in real time.
A point marks a new order block, a triangle marks a touch, and grey points mark mitigation and expiry. Alerts for new order blocks, touches and mitigation are sent in real time as a sound, a pop-up and an email, each switched on or off separately.
Built-In MFE/MAE Tracker
Measures price movement after order block touches.
When enabled, each touch of a bullish order block is tracked as a long signal and each touch of a bearish one as a short signal. The tracker records the maximum favourable and maximum adverse excursion over up to four holding periods, set in minutes or days, and optionally until the opposite signal. The table shows the median MFE/MAE ratio for each period, and an Export button saves it to a CSV file.
See how the MFE/MAE Tracker is calculated and how to read the table →
Signals Readable by Expert Advisors
Order block events stored in indicator buffers.
Detection, zone boundaries, touches, mitigation and expiry of bullish and bearish order blocks are available to an Expert Advisor through iCustom() and CopyBuffer(): buffers 0–5 for bullish and 6–11 for bearish order blocks. Bars without a value hold EMPTY_VALUE.
How to Read and Use Order Blocks
Reading the Zones
Green zones are bullish order blocks, usually below price; red zones are bearish order blocks, usually above it. Many traders read a bullish order block as an area where buying started before a move up, and a bearish one as an area where selling started before a move down.
Grey zones have been mitigated and expired zones are drawn in their own colour, a lighter grey by default. They stay on the chart as history unless you filter them out with Show OB Type.
First Touch and Later Touches
The first return of price into an untouched zone is the event most order block methods focus on, and it is the one the indicator always marks. Later touches are marked only after price has left the zone completely, so a slow drift inside the zone does not produce a marker on every bar.
Choosing the Mitigation Settings
Fully with High / Low treats a zone as used once price trades through it, which keeps zones on the chart through deep tests. Partially ends a zone at its first touch, which suits methods that use each order block only once. Close-based settings ignore wicks and react only to where the bar closes.
Using the Threshold
The threshold line marks a level inside the zone, 50% by default. Some traders watch whether price holds above the middle of a bullish zone, or below the middle of a bearish one. Mitigation at Threshold ends a zone when that level is reached.
Keeping the Chart Readable
On lower timeframes many zones appear. Show OB Type set to Active, a display limit and Max OB Duration keep only the zones that are still relevant. Raising the minimum gap size or OB Min Length makes the indicator stricter about which patterns count.
Measuring Touches with the MFE/MAE Tracker
Enable the tracker and set holding periods that match how long you usually keep a trade. The table shows, for each period, the median ratio between the favourable and the adverse move after order block touches on the loaded history. The results describe past bars on the current symbol and timeframe with the current settings.
Limitations
- Order blocks are defined here by a fixed four-bar pattern. Other definitions exist, and zones drawn by hand or by other tools may differ.
- An order block is confirmed only after the pattern’s last bar closes, two bars after the order block candle.
- Touch and mitigation markers on the forming bar appear as soon as price reaches the zone; with close-based mitigation, the mitigation is confirmed at the bar close.
- The indicator does not provide entry levels, stop-loss levels or targets.
Indicator Settings & Parameters
Inputs as they appear in the indicator’s Inputs tab.
| Parameter | Description |
|---|---|
| License | |
| License Email | The email used for your trial, subscription or purchase. The license is verified with this email. |
| Alerts | |
| Enable pop up alert | Shows a pop-up alert. Default: true. |
| Enable sound alert | Plays a sound when an alert is triggered. Default: true. |
| Alert sound file | Sound file played for alerts. Default: Alert1.wav. |
| Enable email alert | Sends an email. Default: true. |
| Email to | Emails are sent to the address set in MetaTrader 5 under Tools → Options → Email. |
| Order Block Settings | |
| Show OB Type | All, Active, Unactive: All, Unactive: Mitigated or Unactive: Expired. Default: All. |
| OB Range Type | High – Low, Open – Close or Open – High / Low. Default: High – Low. |
| Mitigation Method | Fully or Partially. Default: Fully. |
| Mitigation Price Type | High / Low or Close. Default: High / Low. |
| Gap Size Mode | Unit of the minimum gap: Ticks, Points or Price Percent. Default: Ticks. |
| Minimum Gap Size (Ticks / Points / %) | Minimum gap for each mode. Defaults: 5 ticks, 5 points, 0.1%. |
| OB Min Length (bars) | Bars after the order block candle that price must stay out of the zone for it to be shown. Default: 5. |
| Max OB Duration | Ends active zones after a set duration. Default: true. |
| OB Duration Type | Bars or Minutes. Default: Bars. |
| OB Duration in Bars / Minutes | Duration for each type. Defaults: 50 bars, 60 minutes. |
| Enable OBs Display Limit | Limits the number of zones shown. Default: false. |
| Max Number of OBs to Display | Number of most recent zones shown when the limit is on. Default: 5. |
| OB Threshold Settings | |
| Enable Threshold | Draws the threshold line in each zone. Default: false. |
| Threshold Value (%) | Position of the line inside the zone. Default: 50. |
| Mitigation at Threshold | Ends a zone when price reaches the threshold line. Default: false. |
| OB Alerts | |
| OB Creation | Alert when a new order block is confirmed. Default: true. |
| OB Touched | Alert when price touches an active zone. Default: true. |
| OB Mitigated | Alert when a zone is mitigated. Default: true. |
| OB Signals | |
| OB Touched | Draws the triangle marker on touches. Default: true. The MFE/MAE Tracker uses these touches as its signals. |
| OB Visual Settings | |
| Bullish / Bearish OB Color and Opacity | Colours of active zones. Defaults: green and red, 35%. |
| Mitigated OB Color and Opacity | Default: grey, 35%. |
| Expired OB Color and Opacity | Default: dark grey, 35%. |
| OB Mitigated Point | |
| Display OB Mitigated Point | Point on the mitigation bar. Default: true. |
| OB Mitigated Point Color | Default: grey. |
| MFE/MAE Tracker | |
| Enable Tracker | Turns the MFE/MAE Tracker and its table on or off. Default: false. |
| Enable Opposite Signal | Adds a column that measures each signal until the next opposite signal. Default: true. |
| Calculation Precision | Data used for the excursions: Minute or Tick. Default: Minute. |
| Enable Period 1–4 | Turns each of the four holding periods on or off. Default: true. |
| Period 1–4 Type | Unit of each holding period: Minutes or Days. Default: Minutes. |
| Period 1–4 Value | Length of each holding period. Defaults: 30, 60, 180 and 360. |
| Track Long / Short Signals | Includes touches of bullish or bearish order blocks in the table. Default: true. |
| Show Indicator Name | Shows the indicator name above the table. Default: false. |
| Table Width (%) | Width of the table as a share of the chart. Default: 35. |
| Table Font Size | Font size of the table. Default: 10. |
Frequently Asked Questions
Order Block Basics
The last opposing candle before a strong move: the last bearish candle before a rise, or the last bullish candle before a fall. Traders who follow smart money concepts treat these candles as zones price may react to when it returns.
From a four-bar pattern: an opposing candle that takes out the previous bar’s low or high, a reaction candle in the other direction and a gap between the order block candle and the bar after the reaction. The gap must be at least the minimum size.
The pattern is complete only when the bar after the reaction candle has closed. The zone is then drawn back from the order block candle.
A zone is shown only if price stays out of it for the first bars after the order block candle, 5 by default. Zones that price returns to sooner are discarded.
Fully ends a zone when price trades through it, Partially at the first touch. Both can be judged by the bar’s high and low or by its close.
Setup & Use
It marks a level inside each zone, 50% by default. With Mitigation at Threshold enabled, a zone ends when price reaches that line instead of the far edge.
Set Show OB Type to Active, enable the display limit, or keep Max OB Duration on so that older zones expire.
Order blocks are confirmed on closed bars and do not change afterwards. Touch and mitigation markers on the forming bar appear as soon as price reaches the zone; with close-based mitigation, the mitigation is removed if the bar closes back inside.
How far price moved for and against each order block touch: touches of bullish zones as long signals and touches of bearish zones as short signals, over the holding periods you set.
Yes. Detection, zone boundaries, touches, mitigation and expiry are in buffers 0–5 for bullish and 6–11 for bearish order blocks. Bars without a value hold EMPTY_VALUE.
System Requirements & Installation
What you need to run the indicator, how to download and install it in MetaTrader 5, and how the license works.
System Requirements
- Platform
- MetaTrader 5 (Desktop)
- Operating system
- Windows 10 or Windows 11
- Instruments
- Forex pairs, metals, indices, CFDs and other symbols available from your broker in MetaTrader 5
- Data
- Your broker’s price feed in MetaTrader 5
Not available on MetaTrader 5 Web or Mobile. Custom indicators run in the MetaTrader 5 desktop terminal only.
License Terms
- Lifetime License
- This indicator only, 1 live and 1 demo account, one-time payment, free updates included.
- All-Access Subscription
- All indicators and trade copiers, billed monthly, cancel anytime, updates included while the subscription is active.
- Free trial
- 5 days on the subscription plan. If not cancelled, the subscription starts automatically.
- License binding
- Linked to your email and to your MetaTrader 5 trading accounts: one live account and one demo account.
- Computers
- Not restricted. The license is linked to your trading accounts, not to a specific computer.
Installation
- Get access
Start the free trial, subscribe, or buy a lifetime license on this page.
- Download
The indicator is not sent by email. Open (top right of this page) and enter the email you used for your trial, subscription or purchase. The indicator file (.ex5) downloads to your computer.
- Copy to the MetaTrader 5 data folder
In MetaTrader 5, go to
File → Open Data Folder, openMQL5 → Indicatorsand copy the downloaded .ex5 file there. - Add to a chart
Restart MetaTrader 5 or right-click Indicators in the Navigator window and select Refresh. Then drag the indicator from the Navigator onto a chart.
- Activate the license
In the indicator inputs, enter the same email. On first activation, the license is linked to that email and to the trading account the terminal is logged into.
The license check needs DLL imports. Allow them in the indicator’s Common tab or under
Tools → Options → Expert Advisors. Without them, or without a valid email, the indicator shows a message and does not load.
Updating: When a new version is released, download it again through and replace the existing .ex5 file in the same folder.
Installation questions? Contact support, Monday to Friday.
Related Products
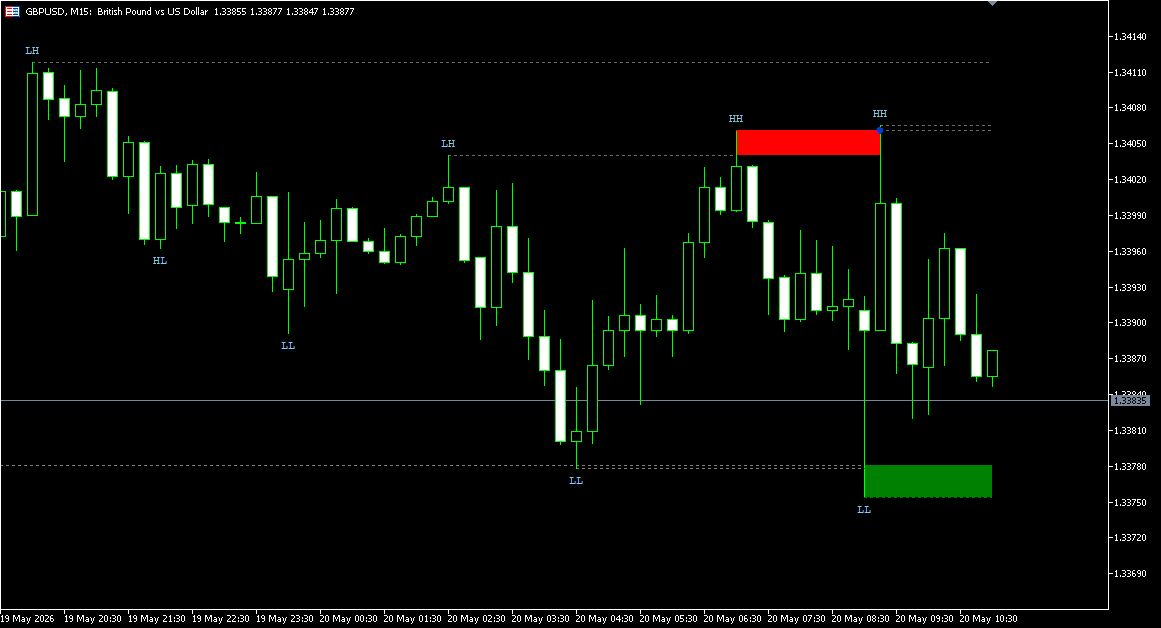
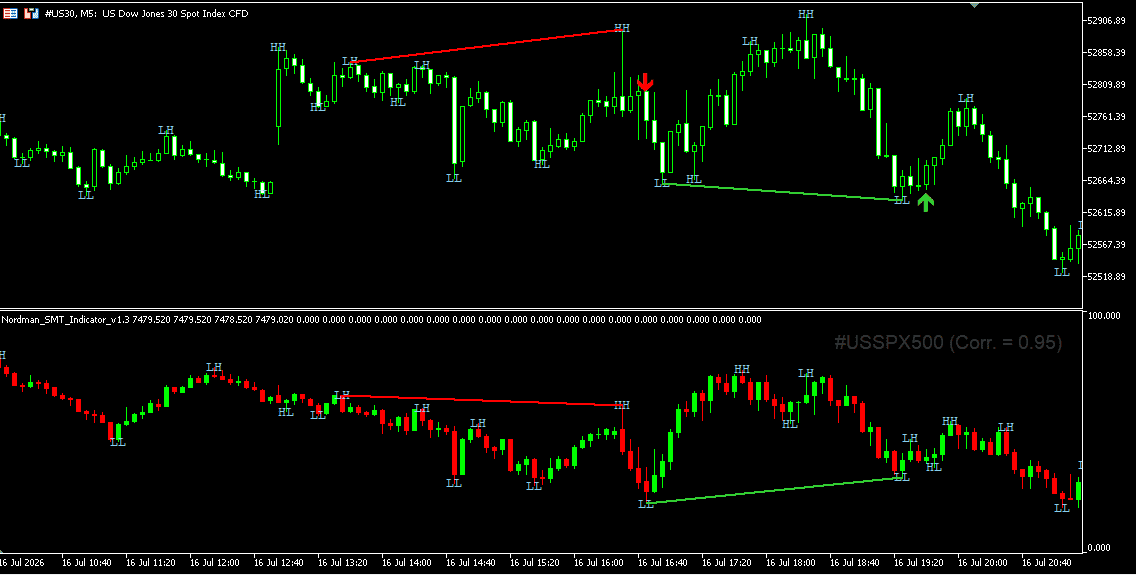
"Best Seller" and "Trending" reflect Nordman Algorithms sales and usage data, January–September 2026.
Disclaimer — Software Use & Risk Disclosure
Nordman Algorithms is a trade name of Nordman Algorithms OÜ (Reg. No. 14435535), registered in Tallinn, Estonia.
Software Use
Software Nature & User Responsibility — Nordman Algorithms provides algorithmic software tools for technical analysis. Nordman Algorithms is not a financial advisor and is not liable for any losses. All trades conducted based on the software’s output are executed at the user’s sole discretion and risk.
Visual Markers & Signal Disclosure — This software may display visual markers (such as arrows, dots, or alerts) when predefined mathematical conditions are met. These markers are provided for educational and analytical purposes only, must not be interpreted as financial guidance, and do not constitute a recommendation to buy, sell, or hold any financial instrument. Users must independently validate all visual cues within their own trading methodology.
No Financial Advice — Nordman Algorithms does not provide discretionary trading signals, investment advice, or managed signal services. Our software represents a mathematical visualization of historical and real-time data. The appearance of a visual marker does not guarantee a profitable trade or predict future market behavior.
Read the full Terms of Service →Risk Disclosure
Trading Risk Warning — Futures, Forex, and options trading involve significant risk. Risk capital is money that can be lost without jeopardizing financial security. Only risk capital should be used for trading. Past performance is not indicative of future results. An investor could potentially lose all or more than the initial amount committed.
ESMA Risk Warning — Financial instruments, especially those involving leverage such as CFDs and Forex, are complex and carry a high risk of rapid financial loss. Our software provides analytical outputs and visual markers based on predefined mathematical conditions and does not mitigate or reduce inherent market risks. You should carefully consider whether you understand how leveraged financial instruments work and whether you can afford the high risk of losing your capital.
CFTC Rule 4.41 — Hypothetical or simulated performance results have inherent limitations. Unlike actual performance records, simulated results do not represent real trading. Because trades have not actually been executed, these results may under- or over-compensate for the impact of market factors such as liquidity. Simulated results are also subject to the benefit of hindsight. No representation is being made that any account will achieve profits or losses similar to those shown.
Read the full Risk Disclosure →Trademark Notice — MetaTrader 5 and MT5 are trademarks of MetaQuotes Ltd. Nordman Algorithms is an independent software developer and is not affiliated with, sponsored by, or endorsed by MetaQuotes Ltd. References to MetaTrader 5 identify software compatibility.
Need a different setup?
We can customize this indicator to your specifications: add new functions, modify the logic, refine visuals, or integrate it with other MetaTrader 5 tools. We also convert indicators into Expert Advisors with trailing stops, position parameter controls, execution filters and rule-based automation built to your technical specifications.
Every project is delivered with full source code and post-delivery support. Fixed-price quote before development begins.